UV's and Mesh Tidy up
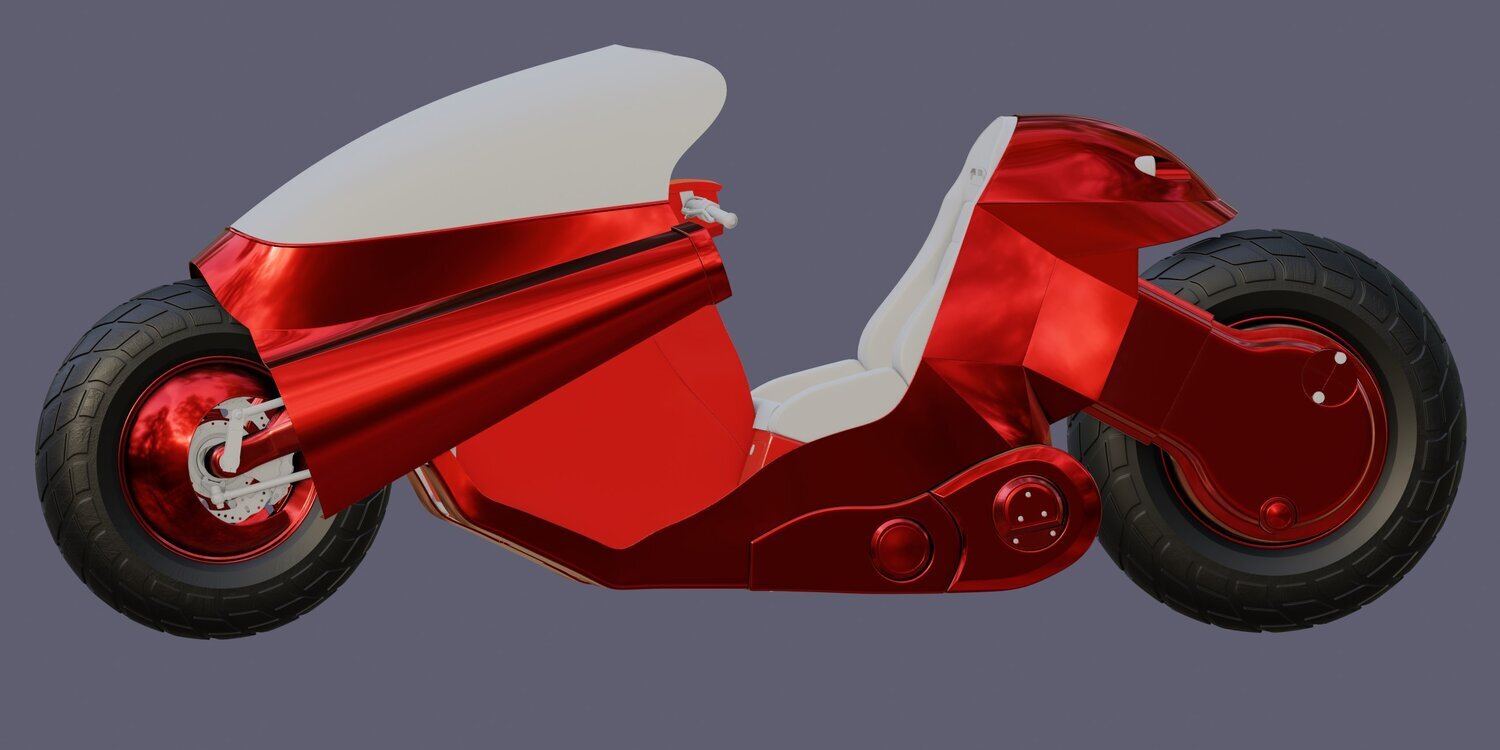
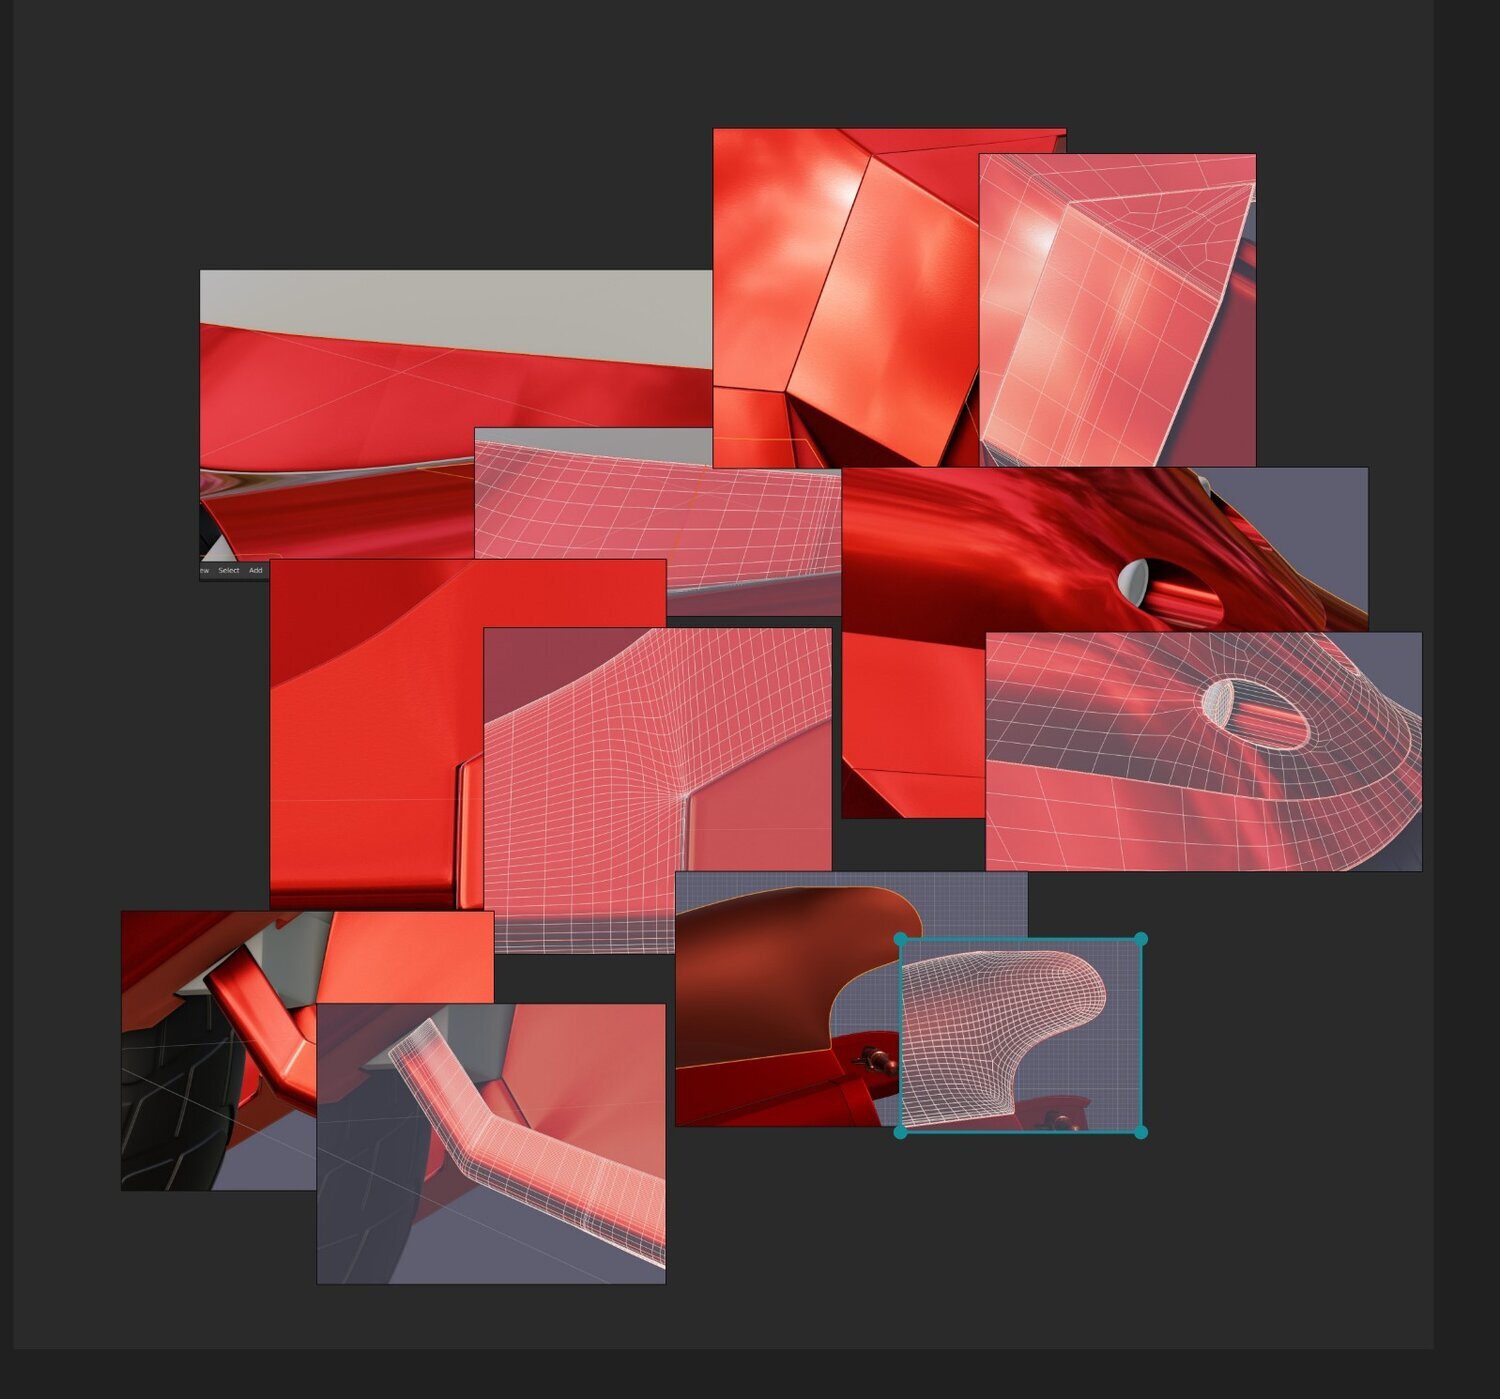
The first thing I do before getting deep into texturing is do a quick check to look for shading and UV issues, there are always some on the first pass. The model shading looked fine with mat cap when modelling but you can see as soon as there a real texture on it there are some issues.
These are just the usual, UV unwrap not quite aligned, missed a couple of meshes for retopo and some spacing issues on the mesh.
However, as I’ve looked at this I’m not happy with the overall mesh flow and some of the shapes like the windscreen, and some joins look bad.
Also where I modelled the pieces separately there’s a bit of variance in mesh density and where it’s really shiny that’s going to be hard to fix tweaking the mesh.
Rather than spending hours trying to fix the existing mesh, now I have the overall shape it’s going to be a lot quicker just to remodel the panels it which is what I did.
example of sub optimal mesh layout
As always happens I had better idea when redoing it and modelled the panels as one piece then split them after, this gave me a much nicer flow and the mesh all blends nicely so well worth doing as these are the main areas you will see in every shot. I just added an extra sub division to the back light as it’s so curvy it needed it especially for the light cut-out when viewed from the side.
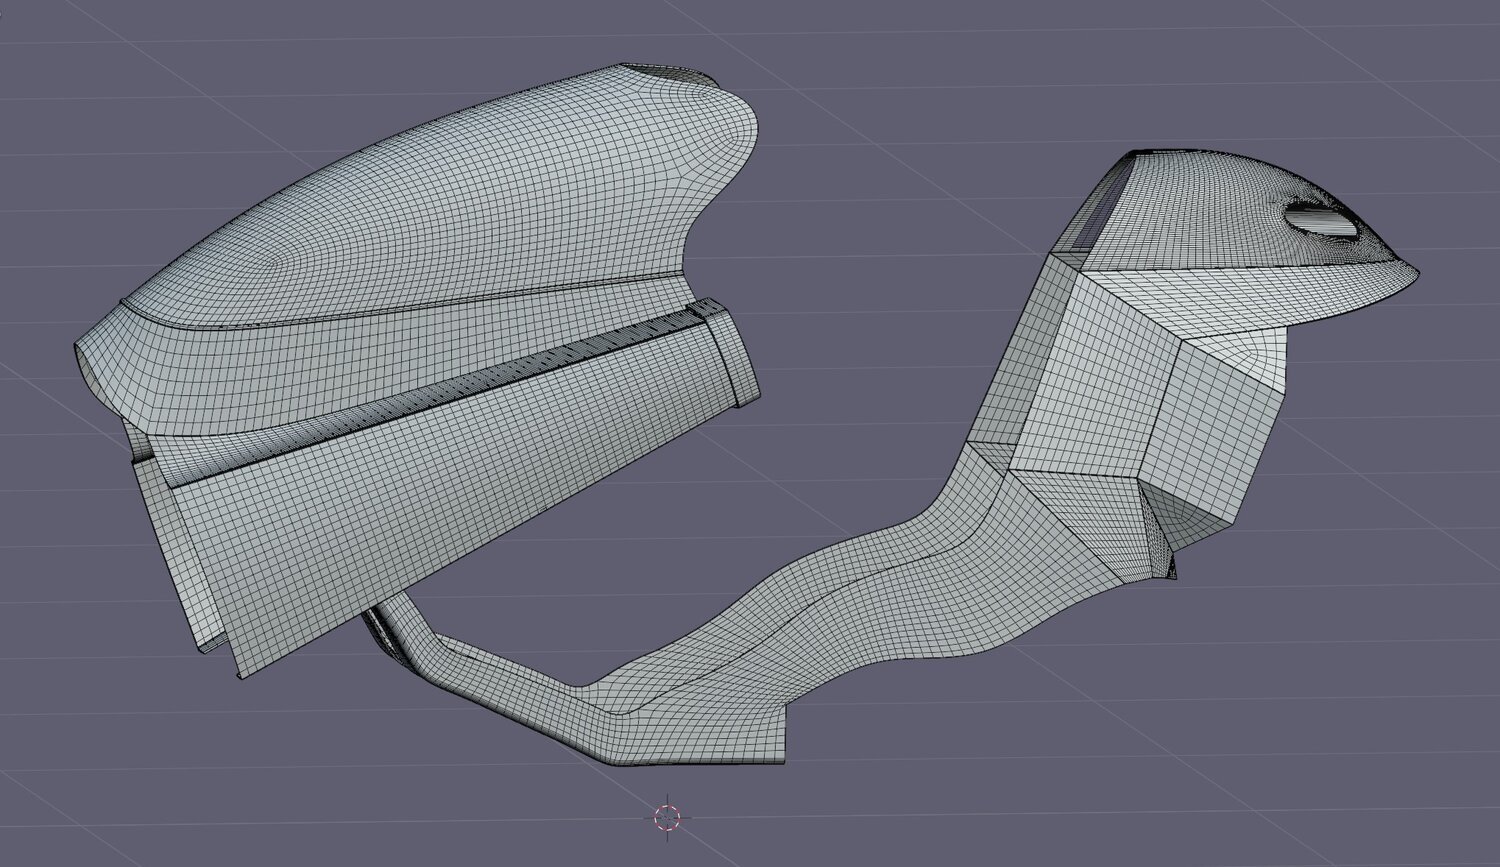
good mesh example
Now all the shading and reflections look much more realistic, one or two more little tweaks I noticed then def onto the texturing! everything else unwrapped great.